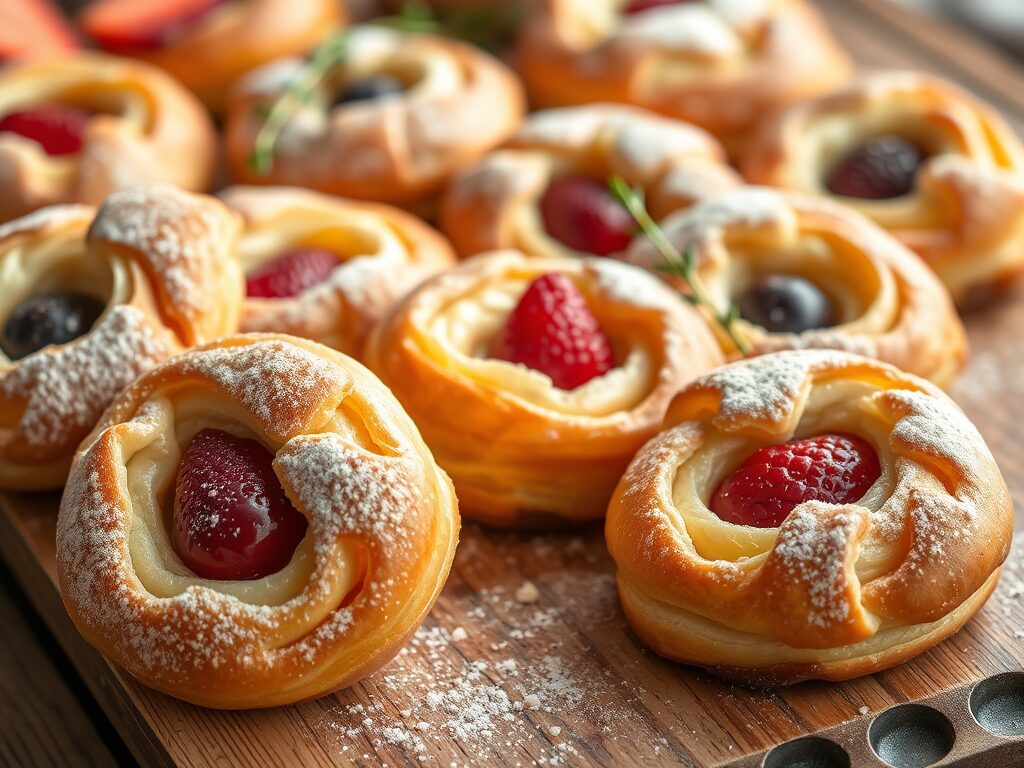
Danish Sourdough Pastries Recipe
If there’s one pastry that captures the heart of cozy bakeries and Sunday morning brunches, it’s the Danish. Flaky layers, buttery goodness, and just the right touch of sweetness—what’s not to love? But did you know that the original Danish pastry has roots far beyond the cafés of Copenhagen?
The Danish story begins in Austria. In the 1850s, Danish bakers went on strike, and bakery owners hired Austrian workers to keep production going. Working with Danish ingredients, these Austrian bakers brought laminated dough techniques that inspired what we now know as “wienerbrød,” or Viennese bread. Over time, Danish bakers embraced and perfected the method, incorporating local flavors and turning it into a true Danish staple.
Fast-forward to today, and we’re giving this old-world favorite a rustic, homestead-friendly twist: sourdough! Using sourdough discard or a well-fed starter adds an incredible tang and depth of flavor, improves digestibility, and fits right into your slower, from-scratch kitchen rhythm, especially when making Danish pastries.
This recipe is ideal for weekend baking, holiday gatherings, or making something truly special. Flaky, golden, and endlessly customizable—let’s dive into the flaky, tangy world of sourdough Danish pastries.
✨ Flavor Boosters
- Add a pinch of cardamom or cinnamon to the dough for warm, Nordic vibes, enhancing the Danish flavor.
- Sprinkle turbinado sugar or crushed almonds over the egg wash before baking.
- Zest some orange or lemon into your filling for a bright citrusy lift.
🧁 Variations
- Berry Cream Cheese Danish: Add blueberry jam and a dollop of sweetened cream cheese.
- Maple Pecan Danish: Use maple syrup in your glaze and top with chopped toasted pecans.
- Savory Danish: Swap sweet fillings for caramelized onions, goat cheese, herbs, and feta.
- Mini Danish Bites: Cut into smaller squares for party-ready pastries.
🍽️ What To Serve With
- Fresh fruit or fruit salad serves as a delightful complement to Danish pastries.
- Herbal tea, chai, or a warm cup of coffee
- A simple yogurt parfait for a brunch spread
🍰 Dessert Pairings
- Light lemon panna cotta
- Fresh berries with whipped cream
- Vanilla ice cream for a warm-and-cold contrast that highlights the delight of the Danish pastry.
🧊 Freezing & Storing
- Freeze Unbaked: After shaping, freeze individually on a tray, then transfer to a bag. Bake straight from frozen, adding 3–5 minutes to the time to ensure your Danish delights emerge perfectly flaky.
- Freeze Baked: Let cool completely, then freeze. Reheat in a 300°F oven for 8–10 minutes.
- Store: Keep in an airtight container at room temperature for 1 day or in the fridge up to 3 days.
🥄 Ways To Use Leftovers
- Slice and toast leftover pastries for a crispy Danish treat.
- Use crumbled pastry bits in a yogurt parfait.
- Dice and layer in a sweet breakfast casserole.
❓Extra FAQs
Can I make this with sourdough discard?
Yes! This recipe works great with unfed starter (discard). It won’t rise as much, but it still gives flavor.
Do I have to chill between laminations?
Yes. Chilling helps keep the butter layers intact, which is key to getting that flakiness that defines a Danish pastry.
My dough isn’t rising—what now?
Cold temps or an inactive starter could be to blame. Let it rise longer at room temperature or try a warm proofing area.
Can I make these gluten-free?
You can try a gluten-free flour blend and use xanthan gum, but results may vary with lamination. Stick to simpler folds.
What’s the best jam to use?
Thick preserves like apricot, raspberry, or fig work beautifully and won’t run during baking, making them an excellent choice for your Danish fillings.